Exposure Meters in the Digital Age

Digital cameras are awesome. They have come so far in such a relatively short time, and I believe that they have overtaken film for quality. The push for resolution has improved lenses out of sight, and dynamic range is pushing boundaries too.

Automation has made us a bit lazy, though. Auto program / auto scene / auto exposure means that it is so easy just to push the button and make believe that we have captured a great image.

Nonsense, of course.

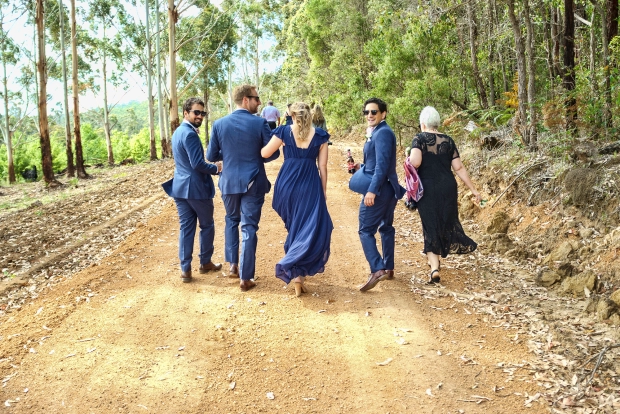
Exposure is still the key to technically great images. Modern cameras are pretty good at guessing the exposure for snapshots, but inevitably fail when confronted with a very light high key or a dark scene or objects. This is because auto exposure thinks everything is an 18% grey card and sets the exposure for this brightness and this brightness alone. This means that white subjects – think bridal dresses, snow scenes, beaches – are always underexposed as they are averaged to be the 18% gray card brightness. Plus 2 stops exposure brings them back to white, but the camera doesn’t know this is what is needed.

Blacks are also destroyed, again because the camera only seek 18% grey. Minus 2 stops makes a black tuxedo black again. Its too hard to remember this when you are shooting quickly, so there’s a better way.

The automation trap is easy to beat – use an exposure meter, specifically an incident light meter. An incident light meter reads the intensity of the light falling on the subject, illuminating it. It doesn’t “see” the scene and therefore try to interpret it, but rather renders a reading to make an 18% grey card properly exposed. It doesn’t cause underexposure of whites nor overexposure of blacks. It also ensures that human skin is properly exposed.

Which leads me to today’s post – Sekonic incident light meters.

Sekonic

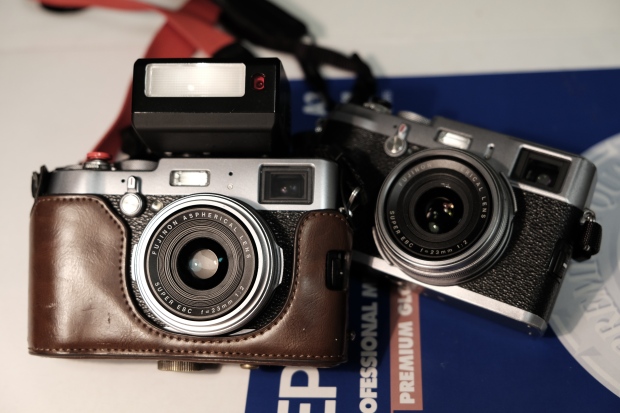
Sekonic incident meter family

I have 3 of them – an L-308B II Flashmate from between 1996 and 2005; an L-358 Flash Master from 2001 onwards, and a more recent L-758 Cine Digital Master from 2011 . Both of them are also capable of metering incident light for strobe photography as well as reflected light.

The L-308 is brilliant, and lives in my small bag. It’s only drawback is that you need to not lose its tiny accessory parts such as the “Lumidisc” that can be used for measuring exposures for flat surfaces such as paintings. It is so small you can keep in in your pocket ready for action. It runs off AA batteries, readily available anywhere.

The L 358 is my favourite of the three as it is small enough to pocket, has less extreme functions to confuse me with, and as it cost me so little if I lose it it won’t hurt. On the other hand, its big brother L-748 is hugely expensive, has a myriad ways to meter, including a 1 degree spot meter for reflected light readings. It can measure and report on illumination lux values as well as shutter and aperture combinations (which is why I have it – it was bought for setting up a room with specific illumination needs for a client – it did a great job then, but I’m a bit afraid of damaging or losing it given its replacement cost today. Another reason I  love myL-358).

It performs without fail over a range of EV EV -9.9 to EV 40.1 (in 1/10 stop) for ISO 100, allows taking exposure measurements in virtually any kind of light.

The L758 is in a different class again. Bigger, possibly better made, it sports an optical finder for reflective measurements. It can measure and report values in lux, foot-candle, foot-lambert and cd/m2. A wider shutter angle for cine work is possible from 1 to 180° and adjustable filter factor. It is worth the bucks if you are going to use its features, but most of us won’t and so the small L358 (which is still in production) is a no-brainer.

They both run off a single Lithium CR123A cell for ages, which is a pain to find when it goes flat and the photo or electronic shops are closed, so buy two and keep a spare in your bag.

I have many other meters that I have acquired over the last few decades, including other Sekonic meters that need mercury batteries so are now in disuse, and a few Weston Master selenium meters. I shall dig them out and show these in another post as they are so darn pretty. Somewhere is a Gossen LunaSix meter which I have just remembered I posses too.

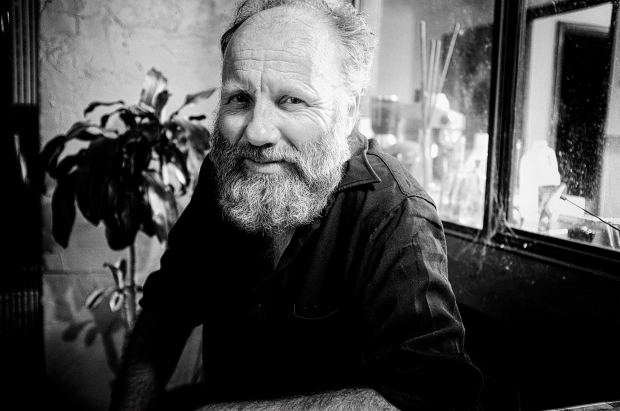
By the way – the photo for this post was metered with the Sekonic family – if I used the inbuilt meter the camera would have tried the old 18% grey trick for the black background. So – moral for this post – if you have an incident meter, use it – your results will only get better.


An Apology to Fuji

Readers will recall that I have stated that I hated the Fujifilm X100 camera in this very publication. Four years have passed and I have had some photo gear come and go, among which was a well-worn X100 that I picked up for just AUD$100 from a foreign student who needed some fast cash. I drive a hard bargain, I’m not apologising for that fact.

Rather, for a hundred bucks I stopped thinking that it needed to be a do-all image making wunderkind. It had been updated with the last Kaizen firmware release that Fujifilm made available years ago, and after a low start I decided that I should give it a chance. Was I surprised.

I love it. I love its 12 megapixel Bayer sensor. I love the fact that I can cart it anywhere. I love the fact that no-one takes any notice of it. I took it along to a wedding some 3000 km from my home, “just in case”. I didn’t touch my DSLR that weekend. I just used the Fuji, and it rocked my boat:

_DSF6067 crop 2

Stonebarn, WA

As we were so close, I visited a friend that weekend I have had since we were both 14 (a bloody long time ago) who is a brilliant artist and musician, and after many red wines (and before that dinner with lots of wine, and before that drinking at a local bar with my beautiful wife and daughter) it still didn’t let me down, and I feel it helped me capture the very essence of my friend who I had not seen since my father’s funeral nearly six long years ago:

_DSF6054 mono

Hello Phil

Sure, the framing could perhaps be better, but hey, wine & beer goggles don’t always help composition. (Philip – if you are reading this, your Canon 500D is on the way over.)

I liked it so much that when an opportunity to yet again buy a bargain came along- an X100T this time – I didn’t hesitate. This one had what some might consider to be serious issues – the diopter control mechanism in the viewfinder was broken, so I got this for not much more than the X100. The internet (“Dr Google”) helped me pull it apart, and armed with just a Torx No. 1 and a Phillips No 00. driver I have hot glued the eye focus adjustment mechanism in exactly the right place for my eyesight, and Hey Presto! – A $1,000 camera that has face recognition, the biggest problem I had with both the Fuji X100 and the X100S that I hated in the first place for less than two hundred bucks. Just bloody wonderful. And here they are together:

_DSF2259

Need another case now…

It came with a lens hood, B&W filter and ring, red lens button, ThumbsUp grip, and three genuine batteries, all in great condition. I already had the case and the EF-X20 flash in my cupboard from before, and I am over the moon about my luck. My daughter is undertaking a street photography assignment at school this year, and I know that at some point we will be making images that speak together using these close photographic cousins. I can’t wait.

There are two morals of this story – don’t sell your X100 for just a hundred bucks; and just because you hate something now doesn’t mean you will hate it forever, so put it away and get it out at a better time. Unless its a Sony camera. I got rid of the RX1R too, BTW, as Sony in its infinite wisdom ignored its user base and refused to issue a firmware upgrade to the RX1 series to sort out the battery drain problem and worse still the constant 1/80 second shutter speed when in auto. Take note, Sony – consumers vote with their feet and wallets.


Hello again – Canon IVSB2 “Barnack” rangefinder

Dear audience / subscribers – I’ve been too busy for far too long with family (gladly) and consulting (sigh) to have had time on my hands to update the Obscure Camera story. Sorry.

Now that apology’s over with, here’s an update finally – meet the fabulous Canon IVSB2 rangefinder and its (correct) Canon 50mm f1.8 screw mount lens:

IVSB2 / IVS3

The beautiful Canon IVSB2 rangefinder

This was manufactured in Japan between July 1954 and July 1956, and is the last of beautiful last knob wind Canon-built “Barnack” era screw-mount rangefinders. It has a better viewfinder/rangefinder than my old Leica IIIF (see my earlier posts on rebuilding that) as they are combined, so the camera only has one eyepiece, with no need to dodge between the rangefinder and viewfinder peepholes, and in this instance the view is still clean, clear and contrasty. No matter, however, as I am going to use it with my Leitz SBOOI bright line accessory finder that fits into the accessory shoe.

The lens has the normal M39 24 TPI screw mount so it will fit any M39 screw mount body (including my Leica and my Canon 7) ever made. It is coated, and again in perfect, clear condition with no fungus or haze. It has nine cured iris blades, so the bokeh will be nice and it will show lovely 18 point sun stars. Like all of the chrome Canon (or Serenar) lenses of this period, the aperture ring is at the front of the lens barrel.

Canon released many bodies in the early 1950s, each one a development on the previous model. This version has Canon’s proprietary flash connection as a fitting on the viewfinder-end of the body, where a canon flash can be slid on and connect with the flash synch terminal. Elegant. It has different speeds on both its high and low speed dials – remember that Barnack copies have a front-mounted low speed dial that in this case runs from 1 second down (up?) to 1/30 second, and the top fitted high speed shutter dial then takes over from 1/60 up to 1/1000. Nice. The focal plane shutter in this unit is in great condition, with almost perfect timings so I am not going to mess about adjusting this one as I had to do with the Leica IIIF. It’s lucky, as I don’t have a CRT TV screen to use to set the speeds properly anymore (don’t ask).

IVSB2 / IVS3

Canon IVSB2 top

As with most (all?) Barnack bodies, the shutter curtains run horizontally, and the top mount shutter dial revolves when the button is pressed and the shutter fires – you need to keep your fat fingers out of the way. The film transport winder has a concentric exposure number counter that keep track of the number of shots you have made – a great aid, and also has an ASA (ISO for the new digital world) film speed reminder.

This one still has its original leather never-ready case, strap and lens cap too. It is in perfect shape with no marks on the chrome.

Let me know what you think of this beautiful image making machine that is even older than I am.

I will try and keep the posts coming.

Sony RX1R – Just brilliant, a Leica crusher.

After 6 months of frustration with the Sony Nex 6 I decided to let it go. It is a camera with potential, but the menu system is so bad I didn’t want to use it. Ever. After I sold it, I found a Sony 16-50 power zoom lens on a hillside where it had either been accidentally dropped or thrown away in disgust. Even this spot of unwanted fortune didn’t make me want another Nex.

I loved the 35mm view in the days of film. I loved it so much that I have a 35mm f1.4 L for my 5D2, and it’s just fantastic. But it’s too big for candid work. So I started researching and decided that maybe a Sony RX1 was going to do it for me. I discovered several tasty things – that Sony hadn’t messed this one up with crappy Nex-style impossible and slow menus; that is full-frame; that it has a fantastic 35mm f2 Zeiss lens. And also that it has an accessory electronic viewfinder.

Image

Enter the RX1 into my stable, in the form of the RX1R with no anti-aliasing filter. I am in love. It produces output as good as my 5D2 can. It is tiny. Even though I normally only shoot RAW, it can produce beautiful JPEGs that are just fantastic. It can also just about see in the dark with its amazing ISO performance.

Here is a grab shot, an image of a co-worker that is a crop from a JPEG shot with no regard to any technical issues. It was at f2 and for everything else, the camera decided what to do. I normally would have shot this as a RAW file, but I had been messing about and it was set to produce just JPEGs.

Image

JPEG file, cropped: f2, 1/1250 @ 3200 ISO, in mixed fluorescent light and daylight. Great file output eh?

Here’s one that was shot is very low light on a soccer field at night:

Image

RAW file: f2, 1/80 sec @ 2000 ISO, converted in Nik Silver Efex 2

Some noise has been made on the web about poor focus performance. I can tell you that this is just nonsense. Look at the proof above. It is far and away better then the Fujifilm X100 I couldn’t get on with (see my earlier posts). I surmise that the focus debate has been propelled by people who have never touched and RX1. Did I say that the lens is sensational? That’s an understatement. Bitingly sharp at f2. great contrast and fabulous bokeh – it gives the buttery smoothness of a longer focal length lens of exceptional quality. The camera is small enough to fit into a coat pocket, and it is tough enough to survive. In my opinion it is capable of producing image files that destroy those from a Leica M240 with a Summicron 35mm of any version.

It is also a good action shooter if you are close enough not to need a telephoto:

Image

Another JPEG: f5.6, 1/500sec  @ 200 ISO

This image of impromptu parkour practice was pumped up a bit in post in terms of colour as the day was flat and overcast.

A couple of tips – set the rear-mounted AEL button to be the focus button (away from the shutter release), set the camera to manual focus and you can have either immediately on hand. Set it to aperture priority, give it a fixed ISO (not auto) again set through a custom button, and you get around the 1/80 second auto-set shutter speed that some people moan about.  Oh, and put a tiny bit of electrician’s tape of the bottom of the EVF and it makes it impossible to lose it by falling out

I say get one – it won’t replace your DSLR, but it will free your creative side significantly, and is a brilliant pairing with a system camera – different horses for different courses. It will make you want to get out and start shooting creatively again.


Standard Madness…

Image

I have had mail suggesting that I don’t actually posses this beautiful trio of three amigos – Canon 5D2, Sony Nex 6, and Pentax Q.  Well, for the doubters, here is a portrait of these amazing picture making machines.  They are all pictured with my favourite lens – the so-called “standard” lens. On the Pentax this is an 8.5mm f1.8; on the Sony, a Sigma 30mm f2.8; and on the Canon, my favourite piece of glass in the universe, the Canon EF 50mm f1.2 L. They all have a similar field of view, if very different apertures and bokeh. With this trio, I feel that I can just about do anything…

I lime the standard lens view so much that I have a bag full of normal lenses that I use (collected over the years), and each is extraordinary in its own way, They range through many eras, from a late 1940s 50mm f1.9 Serenar (Canon), to a Leitz Summicron collapsible (1950s) , to a modern Summicron M (1990s); through Canon’s brilliant f1.2 LTM (1960s) ; to all of the Canon 50mm EF series (f1.2 / f1.4 / f1.8) and a Canon 40mm f2.8 just to mix it up; plus a wad of M42 Takumars of all sorts (1950s-60s, including some zebras). Oh, and many others too too numerous to mention. I just love them all. Most of these lenses can be used on all of these cameras with cheap adapters.

The Nex 6 signage is blacked out with tape as this is primarily a street camera. The Canon is too big to hide so there’s no point for this one, and the Pentax is so small there’s probably no point.

For the doubters, this image was shot with a Canon 5D classic, with the Canon EF 100mm f2.8 USM Macro, another classic

Enjoy them. Just don’t doubt my word.

Goodbye, Fuji X100. Goodbye Canon G12. I hated you equally….

_MG_8070

I’ve been both too busy and too lazy to get involved in posting here for a while, so let’s hope this posting breaks the drought. Please forgive my absence.

EDIT – Image of Nex 6 and Voigtlander 15mm f4.5, with brand identity taped out. Image added 30/09/13

My current photography chore has been thinning down my digital kit so that I have no more than I need (or perhaps I should make that “no more than I want in light of my needs”). Along the way I want to share a few of my observations regarding choice. I have been very busy in this space over the past couple of months.

Goodbye Fuji X100…

I didn’t bond and therefore like this camera.

I used a Fuji X100 for the past six months for my walk-around camera, but I never really got into it as an image making machine. I found that it was far too easy to screw up in too many areas with it that would spoil the images it was capable of capturing – exposure (via the easily rotated +/- compensation dial); focus (as things were very rarely in proper focus thanks to its inflexibility, but they looked great on the LCD only to be a huge let-down in processing); the high ISO performance was not as good as it’s been made out to be by the sympathetic (non-owner/user?) press; and any number of things related to its unique menu structures that could lead to getting lost in the controls and thereby missing a great image opportunity. Even the top retro chrome housing of the camera wasn’t really that great – it was just silver-painted, not chromed, and this finish began to wear off where I held it.

The genuine Fuji lens hood was weird and wouldn’t accept a lens cap, and the filters screwed on backwards. Design clue that led me to believe that Fuji wanted to force an owner into buying only genuine accessories.

I waited months for the promised v.2 firmware update that might resolve my focus issues to no avail. No image stabilisation and no face detect were also spoilers for my snapshot use, so the internet’s favourite pin-up unit has now been disposed of. Maybe its new owner is smarter than me….

Goodbye Canon G12:

I also had a Canon G12 for snapshots, but again I couldn’t get along with it, and ultimately its IQ was not up to scratch because of the tiny-sized and therefore noisy-when-pushed sensor. It was so similar to the disappointment that was the Canon G10 that I also hated. It is also now gone to a new home. I have a Canon A650 IS stuffed in my driver’s door pocket that I like a lot better than either of these cameras, and it only cost me thirty bucks. I also have to confess that I keep a Canon PowerShot A650 IS (apparently a close cousin of the venerable Canon G9) in the car for those moments when I want a chance of shooting something with camera that won’t die from being cooked in the interior of our mobile ovens in Australia over summer – and if it does die from heat exhaustion, well then I have only lost about $30 I guess. It uses AA batteries so I don’t worry about charging it, as you will know that having children means that you keep buying a never-ending supply of batteries.

Both of these cameras I had desperately hoped would be a worthwhile tool for me, but alas, neither of them lived up to the over-hyped expectations I had for them. I am glad they are gone.

But they left a couple of holes that needed filling.

Tiny P&S – Pentax Q:

A while ago you will recall I got hold of a tiny Pentax Q with just a standard prime lens. I was a doubter at first, but I am pleased to say that I have used it sporadically over the past six months, and I am now convinced it’s a great leap forwards on my old Canon PowerShot G12 as a P&S tool even though I don’t have a zoom for it. I love the IQ it can generate, and the standard f1.9 prime lens is outstanding for my needs. Equipped with a super-cheap viewfinder in the hot shoe this is a wonderful tool and is getting a beating now. The killer mode is “bold monochrome” for this one, and mine stays set to it. I understand these cameras are hugely popular in Japan, and I can see why.

Mid-size street-shooter – Hello Sony Nex 6:

The mid-size dilemma was a very tough one to solve. I have used Micro 4/3 kit since its release, and although it is capable of getting the goods, I also picked up a Fuji X100 to give this much-hyped camera a workout. I had begun to suspect that I could do better – a lot better. I loved the Olympus E-P2’s accessory electronic viewfinder, but I had tired of it falling off whenever I carried the camera over my shoulder. I tried an old Leica M8 and hated it, so I kept on looking. My daughter uses a dated Lumix G1 body (she’s 11 and has already won a couple of school photo contests – I am so proud of her), and so my dilemma was solved by just keeping this kit with its lenses for her use, and sourcing a Sony Nex 6 with the bog standard kit lens and the wonderful Sigma 30mm f2.8 prime for my use in this very important street-shooting space.

I am going to service my extra lens needs as and when they arise through my existing 35mm manual lens pool and a couple of super cheap-but-perfect adapters for Leica M bayonet (and therefore M39 screw mount too) and M42 screw mount lenses. The 1.5 crop factor of the industry-leading true APS-C sized sensor allows them to work almost as intended on this body. So far I am liking the Voigtlander 15mm f4.5 Heliar (see the photo above), and the 28mm f2 Ultron.

The Nex 6 is capable of fantastic quality results (spectacular 3D quality images jump off the print and screen alike even just from using the JPG setting and the kit lens, far better results from my first day of Nex 6 shooting than I ever got with the Fuji X100, period), and in the kit form I have it is a small, discrete unit with few issues – no-one looks at you when you are using it, just like with the retro-looking X100. Fabulous features abound for my use – RAW files (although I had to update to Photoshop CS6 to use them, many thanks Adobe for the endless upgrade cycle forced on us – I will NEVER use your cloud solution, BTW); great auto sweep panoramas; and multi-stop auto exposure bracketing that was absent from my Nex F3 (also gone!) and also in a usable from from the X100.

About my only gripe with the Nex 6 is that it is too easy to accidentally change exposure settings through bumping the rear selector wheel, although this camera isn’t in the same league as the Fuji X100 for this annoying problem. It seems a bit slow to start, but I suspect that’s from my use of a huge 32 gb SD card so far – I need to try a smaller one. The Fuji X100 also suffered from slow starts with a big memory card fitted.

Full-size camera – the Canon 5D2 is still my favourite:

I also have a Canon 5D Mk 2 which I continue to absolutely love and always look forward to using as I know the results will always exceed my expectations. Although it is big, it is so easy to use that it never gets in my way, allowing me to not worry about the camera at all and to concentrate on the image instead. The Canon L glass is brilliant and never loses its value once acquired. The Nex will get a workout when I don’t want to take a big DSLR kit.

These three cameras are now the backbone of my image making toolset – the Pentax Q for pocket duties, the Nex-6 for bulging pocket duties when I want flexibility and quality, and the mighty Canon 5D2 for anything needing ultimate quality and guaranteed results, or when i need to use studio-style lighting.

However, I am still looking for the ideal kit bag(s) so that I don’t have to think about which one to grab when the urge overtakes me as I know they can all cut the image quality mustard, and are also fun to use to boot!

What is your photo kit comprised of, now we are well into the second decade of consumer digital cameras? Do let me know by leaving a comment.

Pentax Q

It’s been a long time between posts in my blog – far too long, etc, etc.

Enough apologising already, let’s cut to the chase in this year of the Snake.

Regular readers will know my love/hate relationship with point & shoot cameras. I love the size and portability, I hate the compromised results they give. However, I have been persevering, and even took an Olympus XZ-1 as a pocket camera in a recent sojourn to the USA. It did OK in the main, but I missed far too many shots while waiting for the damn thing to focus, decide on the exposure, warn me about stuff, etc. My main workhorse, a Canon 5D2 with an L zoom was too big and conspicuous to push into people’s faces as a street candid, and so I lost even more shots.

Maybe I now have  the answer – enter the tiny, tiny Pentax Q, fitted with a fast prime lens. Meet my new buddy:

Pentax Q with the extras

You can see here how small it really is, even when fitted with a viewfinder (it needs one as I hate arm’s length snapping), and a lens hood. The SD card should give you a suitable visual scale clue. It makes my Olympus EP-2, itself diminutive, look oversized even when that one wears its Lumix 20mm f1.7 prime. I guess Pentax takes being smallest very, very seriously. It even makes the 1950’s vintage Leica IIIf look huge.

The lens is fast – it’s a 5 element unit with an f1.9 aperture – and it is sharp at that opening. Because the real focal length is so short – 8.5 mm, pretending to be a 47mm focal length standard lens – everything has a tendency to be in focus  most of the time. To overcome this, a pet hate of mine, Pentax has equipped the camera with the smarts to have a setting (“BC” for blur or bokeh control, you can see it right there on the front control wheel ) with which to blur the background and separate out a foreground subject as no other tiny sensor camera can actually do.  I am still coming to terms with this feature.

Here is a picture grabbed from the web showing it next to an old Pentax 110 SLR – they are about the same size (yes, I used to have one, even fitted with a motor drive. It’s such a pity that the 110 film format was so crappy.)

It powers on quickly, it focuses quickly and it takes a picture quickly. The only gripe I have so far is that when saving both DNG RAW – yes, it can produce raw images – and large JPGs together it takes a second or two to write to the SD card, eve with a Class 10 speed card. To cut the write time down, I have been breaking my own rule and not saving images in raw format, but relying on the camera’s JPG engine – yes, it’s that good.

Pentax even provides firmware updates for both the camera and the lens.

I will post some snaps with it in a day or two. You will then be able to see what wonders Pentax (now owned and managed by Ricoh, and it’s easy to see Ricoh’s influence on both the design and firmware support, a great leap forward – I so do like Ricoh) have managed with such a tiny sensor.

The latest body firmware (vn 1.10) also adds focus peaking which will be a boon for manual focus control, and yes, even this feature is well implemented. It just awesome what power is packed into this tiny marvel. Another Ricoh benefit.

The Voigtlander finder pictured above is actually a frame-lined as a 75mm unit, but beyond the lines it shows a standard lens field of view. Maybe the Voigtlander Kontur finder (see a couple of posts ago) is what should be fitted until I can find a cheap Leitz SBOOI finder unit at the right price – if you want to sell me one (or a 50mm Voigtlander unit), feel free to contact me.

More soon, dear readers, and I will have proof for you of what I write.

Footnote – The lens hood in the picture is an old German metal unit originally made for a Zeiss Sonnar for a Contax, of 40.5 mm diameter screw fitting. I called around to see if I could buy locally a rubber collapsible hood of the same diameter – guess what – not bloody well available, it will have to be a Chinese unit off the web. What is wrong with camera shops these days?

Ricoh R10 – the GRD’s little brother

Let me say right off that I like Ricoh products. A lot. It is a quirky manufacturer off on its own direction in a sea of identical hardware with features copied from each other now providing almost no differentiation between makers’ offerings. I own a brace of old Ricoh 35mm cameras that go back a fair way, and I like them for the same reasons – for example, my old 500G has a back door that covers the whole of the rear of the camera, having a cut-out for the viewfinder, a very individual (and functional) approach to solving this problem instead of the me too! approach taken by everyone else in Japan in the 1970s for film doors. Ricoh seems to be a quiet achiever, and with little fanfare it has produced about 50 successful compact digital cameras in the past decade with almost no outlets through which to sell them, at least in my city, the capital of Australia.

A while ago I got my hands on a GRD II to try it out and see what all the fuss was about with the evolution to digital of the classic GR film cousin. Sadly, I never really got on well with it. It was a case of being (for me) too slow and not having a great deal of utility in poor light situations. I got rid of it, but then I regretted this move almost immediately. I was increasingly haunted by the wonderful user interface, its sheer usability, its tiny size, and above all its incredible build.

Suddenly, along came a Ricoh R10, just about the bottom of the species from Ricoh, with no pretensions to greatness, but my Ricoh hunger came flooding back and I thought I would give it a go and see if it had anything to offer to me. What a surprise it has turned out to be! It’s actually great!

It is tiny.

It is extremely well built.

It has a wide lens, starting at 28mm.

It has a long zoom – more than 7x range.

It has anti shake built in via sensor agility.

It starts up quickly.

It is fast in operation.

It has brilliant ergonomics.

It seems to be invisible as it is black and tiny and therefore probably not a threat as a street camera.

It is exceptionally cheap (brand new in Australia they cost just $149, or about US144…, a long way down from the original $450).

Best of all, it produces quality images pretty darn quickly. Here’s a snapshot from it taken at a local burger van, shot with absolutely no care:

Gritty realism (above)

Smooth (below)

And its just, oh I don’t know, just so cool.

It has a 3 inch screen, and seems to be able to shoot from shot to shot pretty quickly. JPEGs only though, unfortunately. Rich has provided good support for firmware updates over its three year market lifespan. It reeks of good design – the 7x zoom collapses almost entirely back into the surprisingly thin body. It has (laser engraved?) lettering describing it embossed into the top metal cover instead of gaudy metal foil stickers all over it. The body seems to be predominantly metal. The list goes on – and remember this is a mass-market utilitarian model camera.

Although I am not a big fan of P&S cameras, I have been hankering for a cheapie to keep in a pocket and not worry over much about. It seems that the R10 ticks all of the obvious boxes for me, and it best of all as it seems to be on an end-of-life run out making it now cost about a third of what it was 2 years ago. It’s so inexpensive that it won’t cause me any grief it it eventually gets damaged by being taken everywhere. And this is the real point I am making, I guess – it is a perfect camera to have to get those shots we all miss by not having a camera with us. I am prepared to put aside my loathing of small sensors and their endemic infinite depth of field on the basis of my chance meeting with the R10.

It is also a lot of fun. I wonder what a GRD III might have been like? Here’s a lifted promo banner from the Ricoh web site to further whet your appetite, accompanied by some tasty specifications:

r10

28-200mm 7.1x optical zoom Effective 10 million pixels Large 3.0-inch HVGA LCD monitor CCD shift image stabilizer 1cm macro Face recognition mode High- sensitivity ISO 1600 Long operation approx. 300 pictures 54 MB internal memoryPRINT Image MatchingExifPrintPictBridgeSDHC

Breaking News (8 November 2012) – The price on new R10s has dropped yet again – now A$128 at Officeworks. Incredible. 


Voigtlander Kontur Finder

I have a terrific friend, Zoran, who from time-to-time lends me bits and pieces, some rare, some expensive, some commonplace, so I can try them out and see if I like whatever it is.  This time around he has loaned me a remarkable bit of kit – a viewfinder that has no view – the strange but effective Voigtlander Kontur finder. I have borrowed it in my seemingly never-ending current quest for an accessory finder for my Leica IIIf with a 50mm lens.

I believe that the Kontur was made for the Voigtlander Vitessa fitted with an accessory shoe as an alternate finder to optical finders for quick snapshot use (although my version doesn’t sport one). Here it is fitted to my favourite Canonet (a QL19 that took me a month of lunchtimes to repair, hence the red leather skin, but that’s another story for another post):

It is a chunky black plastic cube, with an eyepiece at the rear, and no obvious viewing window on the front, just a black nameplate in a metal frame that notes it is for 24×36 and 35mm – yes, a viewfinder without a view. Check that again – a viewfinder with no view. When you pick it up and look through it with the customary one eye open, one eye closed viewing arrangement most of us use, all you you see a black field, outlined with a solid white frame line and a dotted parallax frame. Oh yes, and a white dot in the center. A very strange unit, this, for a finder. If you switch eyes, you see the same thing:

Not very promising, eh? But now if you open both eyes, all of a sudden the design reveals it brilliance, a breathtakingly simple and blindingly clever finder for fast work. This is an approximation of what you see (I hope that it is an internet first):

Clever, eh? All you do is set the lens to a suitable hyper-focal distance, and shoot away. It is fast, just perfect for street shooting.  I believe that the viewing lens allows you to focus on the back illuminated frame lines – the central dot is to give your eye something to look at to make it all work in focus (but there is no straining to see the image at all). The other open eye sees the scene, and the brain superimposes the images, “seeing through” the blackness to give you a pretty damn fine rendering of the scene in front of you. Photo-journalist’s heaven. The finder works very well in dim conditions too. Confusingly, the numbers on the finder’s front screen mean that it is for a 35mm camera with a frame of 24 x 36mm, however this model gives a view of a standard lens – a 50mm unit on a 35mm camera, and not that of a 35mm lens.

Zoran might have a hard time getting this loaner back off me – I love it.

Bringing the Olympus 35 SP back into service

Olympus 35 SP

A couple of weeks ago I got my claws on a nice but not-quite-functional Olympus 35 SP rangefinder. If you look back at the lead photo in my post about this camera, you will see that the silver filter ring around the front of the lens is dented. This in itself was of no concern to me, but it was preventing a very necessary spot of maintenance on the lens being performed. You see, the front rings (aperture, speeds, etc) were loose and very wobbly, making it exceptionally risky to use them in the face of unseen internal damage from poorly meshing clockwork controls. This meant that until this was fixed, the camera was effectively a very pretty brick.

The dent in the filter ring meant that the collar inside that ring holding the guts of the lens in place could not be unscrewed. Without access, it would simply stay wobbly. So, I found the wooden filter ring dent-bashing die I had made to fix an earlier rescue, and started judiciously tapping the dent out with a light hammer and a wooden dowel as the drift. Two hours of tapping, being careful not to stretch the aluminium eventually allowed me to unscrew the retaining collar, and then I got the access I needed.

What had happened to make the front cells of the lens wobbly was simply a result of the failure of the Locktite (or whatever) that Olympus used to hold the three front cell screws tightly in place. The screws had wobbled loose, allowing the lens to flop around.

A few turns of a cross-head driver and they were tightly locked back in place. The shutter speeds were thankfully perfect before the surgery, and there was no trace of the dreaded oil on the aperture blades syndrome either, so I had to dig no further into the shutter mechanism. It all screwed back together well.

Time to test the meter. In with a zinc-air cell. Nothing. In with some packing around the cell to keep it centered. Nothing. In with a wad of aluminium foil to make a better electrical contact. The meter sprung to life! It seems to be pretty spot-on at 100ASA according to my Sekonic meter. I have noticed that the ASA / ISO adjustment doesn’t seem to make any difference, so I think it will need surgery under the top cover to fix that problem. It seems that the ASA adjustment is supposed to alter the size of the eyelids that cover the CdS metering cell, and this doesn’t happen when I rotate the adjuster. Oh well, I guess this is gummed up. Into the top cover tonight.

A quirk I have discovered is that there is no off switch for the meter, meaning the battery will drain if it is left in the light. The switch is actually the (n)ever-ready case – covering the meter cell by closing the case kills off the current, so this is one camera that needs its case to be in good shape. Luckily, Olympus didn’t scrimp with the case. Instead of the usual cardboard case covered with glued-on  decaying vinyl, the case is actually a beautifully constructed sewn leather, steel and velvet affair that has lasted the distance, and still does what it is supposed to do – protect the camera, and work as the meter switch.

Still to go after sorting the ASA adjustment is checking the rangefinder accuracy so it focuses perfectly (a trivial job), and replacing the usual sticky goo that the light seals have now become. Again, this is a trivial job, so it won’t be too long before I put a few films through to see how wonderful the seven element G-Zuiko 42mm lens actually is – I wonder if it will live up to the hype abounding on the internet, that has made this camera so desirable and expensive?

Keep watching for more progress…

26 August 2011 – The ASA adjustment was easy to sort out – I removed the top cover, and found that the spring that pushes the cam follower against the ASA adjustment cam I predicted would be there was not fitting properly. A two second fix-up and hey-presto, the eyelids over the CdS cell now work properly. The exposure value for 125 ASA reads the same as from my digital Sekonic meter, so I am very, very happy. The spot meter works properly too. I still have to hunt down some light seal foam for the back door to get it sorted fully. One minor annoyance did made itself known. Every 35SP I have seen is missing the spot meter button fitting from the back plate, and now I know why. The black plastic button surround was originally fitted via a single screw onto the top internal deck. In my camera’s case, someone has been in before, and overtightened the screw, breaking the fitting, rendering it available to loss. I will be building the missing plastic up with two pack rock-hard-when-set adhesive (Araldite), and using a Dremel to shape it back to how it is supposed to be, then drilling and fitting it back properly.

Batteries are easy – the SP was designed to use a now-outlawed and therefore unavailable 625 mercury battery. If tou use an alkaline unit instead there is a voltage drop over its life that affects meter accuracy, so instead I use zinc-air hearing aid batteries, fitted in with an O-ring for diameter size and pack it with cooking foil.

Three views at 125 ASA – left, the camera showing an EV of 7; center. the camera set to an EV of 7 – note that one of the possible exposure pairs is 1/4 sec @ between 5.6 and f8 ; and right, finally my lightmeter reading looking at exactly the same scene – guess what -1/4 sec @ f8 for 125 ASA Pretty darn good for 40 year old camera running on a deaf-aid battery..

28 August – Light seals. What a mess. Lighter fluid (for Zippos) works to assist in dissolving these into a sticky, black, tarry mess. Reminds me of raw road bitumen, but way nastier. It gets stuck to everything it touches when it is scraped off and marks it, so be careful if you undertake this job. I used orange sticks as scrapers to get the dead collapsed foam out. It took about an hour of persistence to clean it up, but now it’s done and I will put in new seals as soon as I get some suitable black foam. I noticed that the 35SP has a seal at the top of the back door, but not along the bottom. I wonder why? Is the top seal actually really necessary? Does anyone know?

29 August – This is getting too easy by far, I must be heading for a problem. Light seals are now sorted. Three small pieces of dense black felt have been glued into their rightful places. Cut to size and glued in with craft glue, a clear, acetone-based flexible fast-drying compound is holding the new seals bits in nicely.  Not much to do now.

New felt light seals fitted. The shiny pock-marked bit is the film pressure plate

The felt seals are at the top and left hand side of the door.

1 September – As predicted, the spot meter switch fell out, fortunately right in front of me. This will be the absolute priority to sort, with then only the rangefinder check / calibration to go. Perhaps a Domke strap will be added – I have an Olympus 49mm hood to use already.

4 September – The spot meter button surround is now sorted out. I found some 2 pack epoxy and added a section of plastic where the original was broken off. Judicious use of the Dremel,  and Hey Presto! as good as new, and fitted nicely back into the camera. The meter now functions properly, switching between average and spot modes. You will need a battery to get it going – I use hearing aid Zinc-Air batteries – 5 bucks for a pack of 4. Same voltage as an outlawed mercury PX625 cell, lasts for months. They only need a bit of foam or an O-ring to fit size-wise, and a bit of cooking metal foil as packing to make a good contact. Only the rangefinder now left to check.

6 September – And hopefully the last. The horizontal alignment was spot on, i.e. at infinity focus the rangefinder patch showed infinity. Perfect. Less-than-perfect was that the rangefinder patch was not aligned vertically – most off-putting. How to fix it? There is not much info on the web about this adjustment, and nearly all of it is wrong. It is not the cross head “screw between the three light meter diodes” as suggested on the normally reliable Rangefinder Forum. It is in fact a knurled adjuster on the right-hand side of the central pane of the internal viewfinder. Rotate this forwards and the patch drops, and vice-versa. Be careful as it looks very, very delicate. I used tweezers – make sure you don’t slip or you will damage the viewfinder… Good luck

I have bought some Ilford HP5+ 400ASA film for this beautiful little gem of a camera. Cross your fingers.

17 September 2011 – Hmm. The lightmeter eyelids jammed again. Out with the film, and off with the top, and a couple of tiny spots of oil on the places it sticks have fixed this issue (I hope). I use a small syringe sold for diabetics to inject insulin as an oil can – with the hypodermic needle I can get an absolutely tiny drop in the right spot. I also cleaned the viewfinder internals, and it is now beyond incredible, just a brilliant view. I am now having trouble deciding whether to use this or my M6 – what a quandary.